You cease to be effectively under hostile fire once you achieve fire superiority. At that point, you are able to switch from delivering either Care Under Fire or casualty self-care to administering tactical field care.
What’s in this blog post
Skip the sections that discuss topics about which you already are well-versed. Instead, click the links to go to the sections where your medical knowledge needs reinforcing.
This post discusses the various ways and steps in priority that medical personnel can do a better job of saving lives in combat. This post also describes what should be considered the standard of care for tactical field care.
Tactical Field Care
The hostile situation in which you find yourself can change in an instant, so don’t fool yourself into thinking you’re out of the woods when your team has achieved fire superiority or the other team’s weapons have fallen silent.
So be careful.
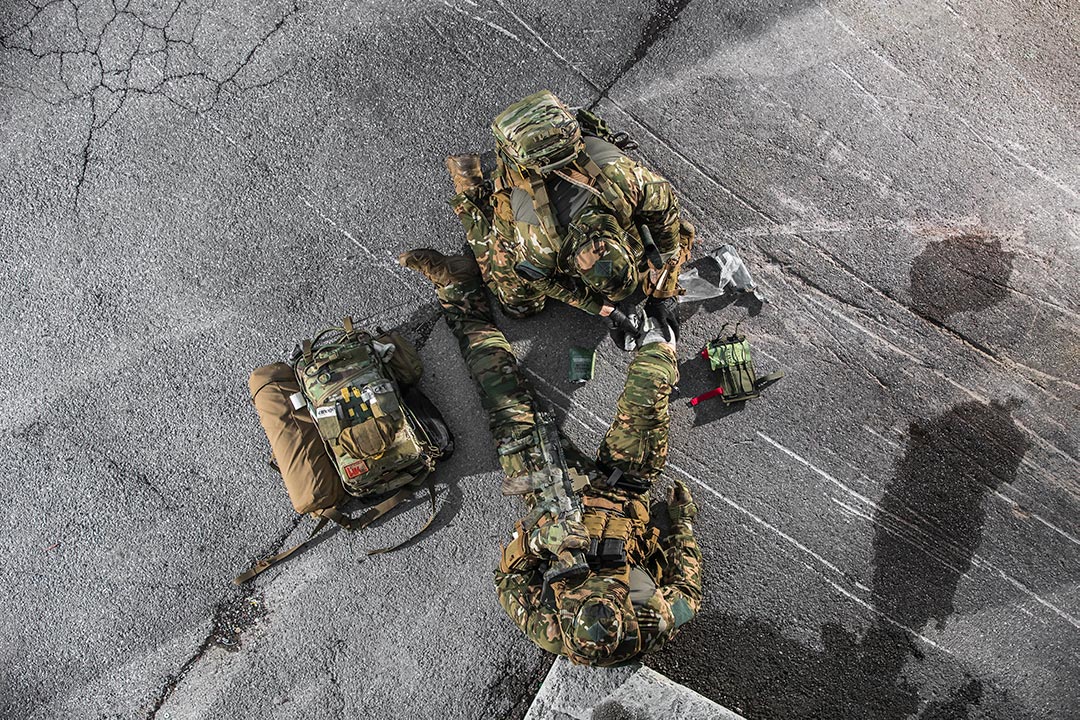
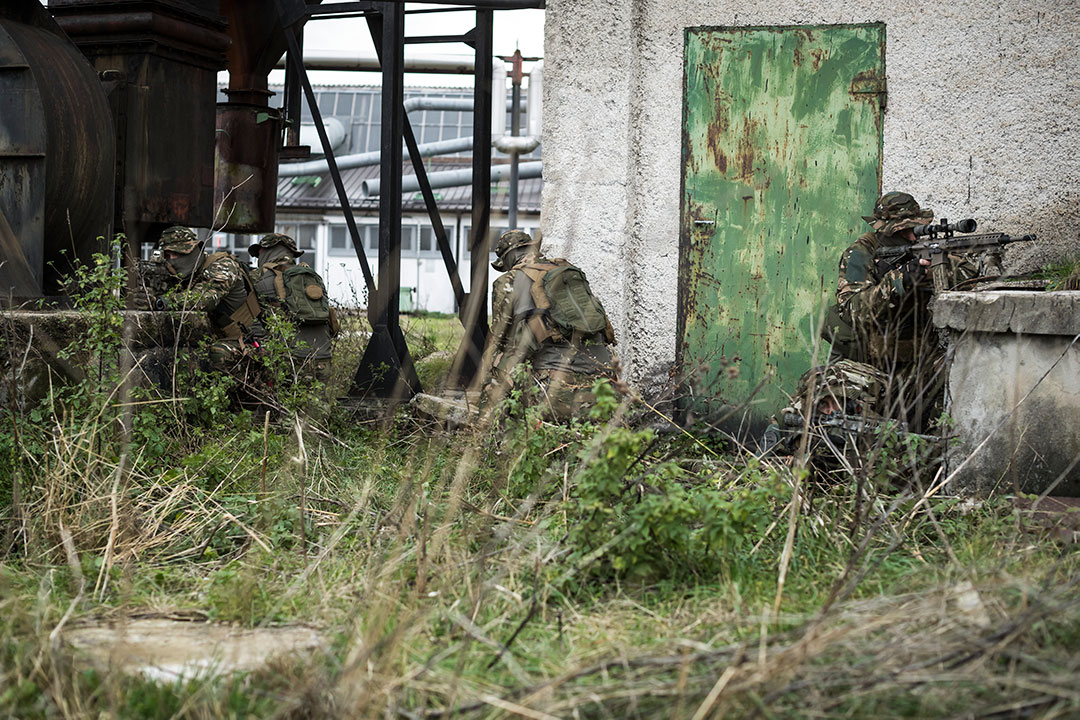
Before you start taking care of your casualty or casualties, make sure your place is secure.
Maintain a 360-degree safety perimeter. Then begin triaging the casualties as needed.
This is the next stage of combat casualty care (COTCCC,the Committee on Tactical Combat Casualty Care) developed many of the care concepts presented here, and I’ve supplemented them with a number of my own).
In this next stage of combat care, you should consider putting on latex gloves—before, during the firefight, there wasn’t time or opportunity to be concerned about minimizing infection risk; but, now, there definitely is.
Also, if you think the situation is bad because your casualty isn’t looking great (perhaps because of an unobvious massive hemorrhage), then you should listen to your “Spidey senses” and call for a MEDEVAC/CASEVAC ASAP.
And, whatever you do, don’t cling to this trauma care manifesto like its your bible—if you think your patient needs, for instance, a pericardial thumb, well, just do it.
Do everything within your power to help him.
Tactical field care begins in earnest with the redistribution of resources (if that hasn’t already happened during the Care Under Fire stage).
For example, let’s say our guy is carrying sensitive mission items. You know, things like a portable communications system.
Sensitive mission items need to be placed in safe hands so that the casualty whose mental status might be messed up as a result of his injury doesn’t do something stupid, like calling in an airstrike on us (or something else equally demotivating to our team).
Similarly, we really don’t want him holding onto his weapon and grenades after dosing him with painkillers that make him high as a kite.
Besides, the weapon and grenades taken from him can be given to the security detail so they’ll have more ammo available for defending the perimeter.
But here’s food for thought. Rather than strip the casualty of his weapon, you might leave it with him after you remove the magazine (plus the others in his pouches) and clear the chamber.
Letting him hold the emptied weapon can be psychologically helpful.
Specifically, it can give him hope, which is a powerful thing. After all, our casualty is still a warrior and he wants to help us. He doesn’t want to feel that he’s a liability or exposing the team to danger because of his injuries.
What about if you find a casualty who’s suffering polytrauma?
That, in plain English, means our guy is really fucked up—has no pulse, no respiration, no other vital signs. Him we do not resuscitate. Him we attempt no CPR on.
The reason is that we aren’t going to be successful saving him, and the effort to do so is going to take too many people away from the fight (which can result in many more casualties).
But the flipside is you have to be Semper Gumby—Always Flexible.
So, if you’re there on an evacuation platform, go ahead and do CPR (provided you have the ability, which you probably do, since you have hands, right?).
In this situation, doing CPR is proper because you’re supposed to do everything in your power to try and save him.
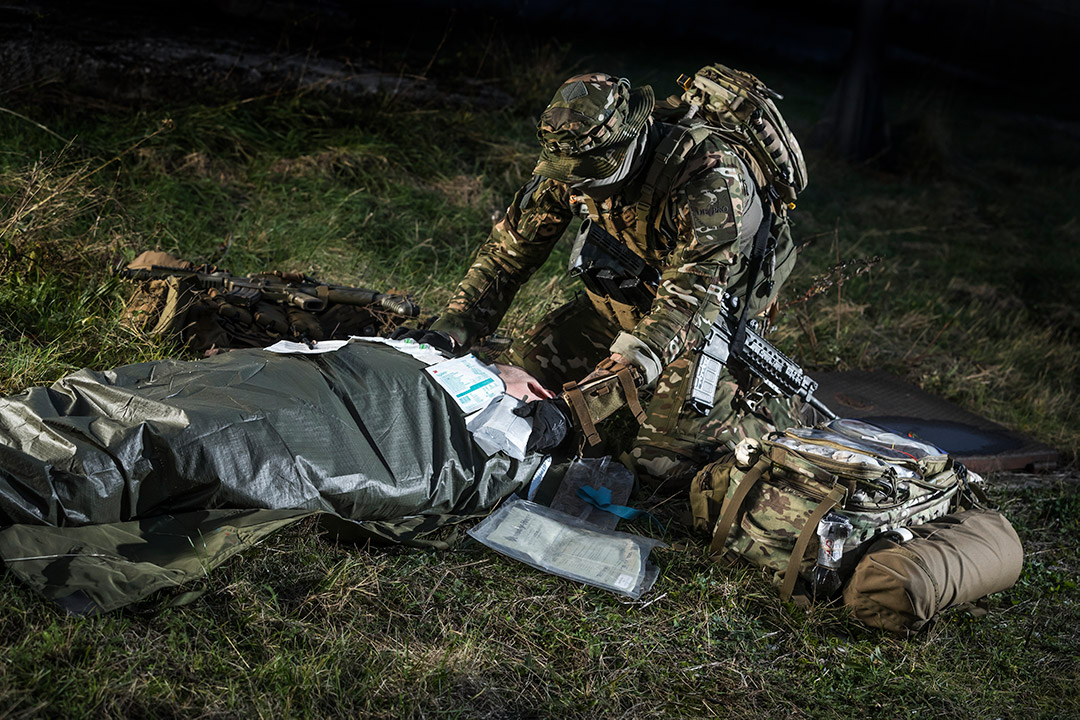
The real work of tactical field care begins with an assessment.
For this task we use the MARCH PAWS algorithm.
MARCH stands for:
- Massive bleeding
- Airway management
- Respiration
- Circulation
- Head injury/Hypothermia/Hypovolemia
PAWS stands for:
- Pain
- Antibiotics
- Wounds
- Splints
Here’s how it all plays out.
MARCH Algorithm
M — Massive bleeding
Picking up where you left off during Care under Fire, go straight into a reassessment of how well you’ve controlled any hemorrhaging.
Check to see if the tourniquet is still holding or if he needs another (if another is needed, apply it side-by-side with the first one; skinny guys often need two TQs).
On the chance that you’ve not yet done anything, look for signs of massive bleeding. When you see such signs, apply a tourniquet, positioning it high and tight.
If you can't control bleeding with a CAT, use a hemostatic agent.
Examine the casualty again and look for missed major bleeding in especially critical areas such as the neck, armpits, and groin.
Don’t forget to keep talking to the casualty throughout the entire process.
This is how you evaluate his degree of consciousness.
Moreover, him talking to you means his airway is patent/open—and if he’s making sense as he speaks, it means his brain is getting adequate blood/oxygen (a good indication that he’s not at the moment experiencing hemorrhagic shock).
Degree of consciousness—AVPU
- A – Alert: awareness of time and place
- V – Verbal: responds to your words
- P – Pain: reacts to it
- U – Unresponsiveness: no reaction to stimuli
As mentioned earlier, you need to disarm a casualty whose injury has caused him to enter an altered mental state (such as going out of his mind with delusion or psychosis), redistribute his sensitive items, and relieve him of his radio in order to prevent harm to others on your team.
A – Airway Management
Assume you’ve got a casualty who’s not talking.
In that case, open his airway, look into his mouth, clean it, and listen for the sound of breathing.
Also, while you’re listening, look at his chest and note whether it rises and falls (signs of inhalation and exhalation). Stay on his breathing for at least 5 to 10 seconds (in other words, don’t just robotically run through the drill).
In the event the casualty is unconscious, you’ll need to secure his airway.
Typically, this is accomplished by tilting his head back and keeping his chin lifted (this positions holds open the airway).
Alternatively, you can use a recovery position or give him an NPA (if you opt for an NPA, don’t forget to tape it down to his face, otherwise it’ll likely slip out—and don’t worry about the slight 1 percent or 2 percent chance of poking his brains with that NPA if his head’s split open since it’s far worse for him to be without a patent airway).
Let’s say our guy is awake and can’t breathe because you’re doing what you were taught in medic school and that is to try rolling him over onto his back.
What you should do instead is allow him to take any position that helps him breathe.
For example, a casualty with facial trauma and bleeding into his mouth or nose may be better able to maintain his airway by sitting up and leaning forward—avoid forcing him to lay down since that’s only going to cause all the blood and saliva to pool up in his airway.
Unconscious casualty with an airway obstruction
- Head tilt, chin lift
- NPA
- Recovery position
Casualty with an airway obstruction
- Head tilt, chin lift
- NPA
- Allow the casualty to take any position that helps him breathe
- Recovery position
R – Respiration
Expose the chest, then look for wounds and for indications that your guy is still breathing (note that stress can prevent you from hearing or seeing him inhaling/exhaling, so place your hands on his chest and feel for signs that respiration is occuring).
Apply an occlusive dressing to all wounds you find on the chest, armpits, and neck (rule of thumb: “from the nose to the hole deserves an occlusive dressing, why to the hole because the diaphragm moves so low”).
As you place the occlusive dressing, listen for any sucking or blowing sounds.
If you don’t put a halfway valve over the hole, make a mental note that you’re probably also going to have to do an NCD (or at least burp the wound).
Carefully check for broken clavicle, sternum, and ribs, but don’t press down like a maniac if you see discoloration or evidence of bruising in those areas.
Check his back by using the “buddy hug” technique—and while you’re at it you should also perform a minor check for any downside wounds.
Be on the lookout for a tension pneumothorax if your guy has an abdominal/chest wound.
Remember that rule of thumb I just gave you about how the diaphragm tends to move quite low.
So be thinking about the possibility of performing a needle chest decompression in response to a chest wound (or even the suspicion of a chest wound) where there is progressive breathing difficulty.
C – Circulation
As at the beginning of our MARCH PAWS algorithm, it’s vital to double-check your Care Under Fire interventions and make sure they’re still holding.
If necessary, expose the wound and place an adapted CAT three fingers above it (remove the CAT once you determine there’s no longer a need for it and, in its place, apply a compression bandage).
A suspected broken pelvis should be stabilized with a splint.
Do a head-to-toe blood sweep with clean hands (doing it with bloody hands can give you a false positive).
If your clean-handed sweep yields blood on your fingers or palms, then you know to pinpoint the wound site, expose it, evaluate it, and take appropriate actions (such as applying gauze, pean, compression bandage, a CAT, and so on).
No immediate action is needed in the event the wound turns out to involve minor venous bleeding.
Feel whether his pulse is strong or weak.
You might not be able to find a radial pulse—no radial pulse means his body isn’t decompensating for shock very well (first thing to do in that event is check for a pulse at his carotid artery to make sure he’s even still alive).
Next, evaluate peripheral circulation by noting his skin temperature and the presence of sweat.
Check for a broken pelvis before turning your guy onto his side. Stabilize a suspected broken pelvis with a splint and move him in accordance with your unit’s SOP for a broken pelvis.
While you’re checking for that broken pelvis, also look for broken bones elsewhere (sternum and femur especially).
Prepare all needed equipment, including additional occlusive dressings, bandages, litters, and heat blankets.
Position him on his side and begin treating the downside wounds with an occlusive dressing (be sure to first remove the clothing from his upper body).
Rotate the casualty onto his back and reevaluate:
- Degree of consciousness
- Airway, breathing, circulation
- Interventions
- Did the NPA fall out?
- Did the CAT come undone?
- Are bandages/ chest seals still holding?
- Is the NCD at 1/4 turn and still working?
- TCCC card properly filled out
Using a waterproof marker, write on the CAT/TCCC card the time of the CAT.
Note as well on the card whether you removed a no-longer-needed CAT and replaced it with a compression bandage.
H – Head injury/Hypothermia/Hypovolemia
Keeping a casualty’s body temperature up is extremely important because you don’t want hypothermia setting in.
First thing to do is minimize his contact with the elements. Get him out of wet clothes and dress him in dry ones.
Put him on the litter and wrap him in a heat blanket (if you don’t have a heat blanket, improvise with whatever you can get your hands on).
Bandage head injuries that appear to be minor. For serious ones (such as those involving traumatic brain injury), don’t let him lay down and—if available—give him oxygen.
Treating traumatic brain injury (TBI) requires a physician’s involvement, so get your casualty to the doctor ASAP.
Signs of TBI include an altered mental state, dilated pupils, yellow liquid leaking from the nose or ears, deformation of the head, and bruises around the eyes (making him look like a raccoon).
At a minimum, you should get the casualty’s vital signs and be able to tell if he’s going into shock (hypovolemia) or if he’s already in it. Then be ready to start an IV/IO so that fluid therapy can be given (hypovolemia is the result of a sudden loss of fluids, such as blood). You’ll also need to know your unit’s SOP for treating hemorrhagic shock, TXA, and infusing whole blood.
Watch the M.A.R.C.H. algorithm in action in our Combat Medic Essentials video series.
PAWS
Now that we’ve finished our look at the MARCH algorithm, it’s time we move on to a discussion of PAWS.
MARCH was all about saving a life. PAWS is all about making it a life worth living.
P – Pain
This is self-explanatory.
You need to provide the necessary interventions (such as splinting to stop or limit bones from grinding against muscle, nerves, and one another) plus medications to control and manage the physical hurt your guy is experiencing.
A – Antibiotics
Orally give your casualty his combat pill pack (assuming he’s able to swallow).
These pills will not only help resolve or prevent life-threatening infections but also help reduce his pain.
W – Wounds
Check for additional wounds—those you missed previously and those you spotted but “saved” to be addressed later.
Injuries that are easy to overlook include burns (such as those to the face, which often occur in confined spaces and tend to be connected with airway inhalation injuries).
When you encounter wounds be ready with a quick intervention or to ASAP call in the doctor (or medic, if you aren’t one yourself).
Look too for bone fractures, eye injuries, scalp injuries, and eviscerations (scarier-appearing than they actually are, so in the interim just cover them up as best and as gently as possible),.
In the case of a head injury, it’s usually a good sign when your casualty is screaming or cusing like a banshee.
Not a good sign us if he’s quiet and hunched off in a corner.
S – Splints
Immobilize the fracture and reassess the pulse.
If your guy has a fracture or dislocation but no pulse, try to straighten the affected bones and then reassess for signs of a pulse.
Do these things with care and demonstrate good bedside manners (remember the Golden Rule: do unto others as you would have them do unto you).
Think about the steps you’ll take before you start; don’t just jump in without a roadmap in mind.
Prepare all of the equipment you’ll need.
And if you found your casualty already wearing a splint he applied on his own, let it suffice—don’t try to fix what’s already “fixed”—but do check for a pulse regardless.
Don’t forget to use your coms capability to contact tactical command and get some help from personnel at the next level of care (they have bigger brains than you and I, and it’s a good idea to make use of them whether or not we know what we’re doing).
Also, always remember to talk to your casualty—explain what you’re doing, offer him words of encouragement, and so forth.
Use your time wisely while awaiting the arrival of the Medevac team.
For example, secure the casualty’s personal effects or equipment to his litter so that the rotor wash from the helo as it lands causes nothing to tear loose and put glasses, ear protection on the casualty.
Also, have your guy’s TCCC card completely filled out (that’ll make the handoff go a lot smoother).
One more thing about Medevac. When it arrives, obey the guy onboard it.
The Enemy Combatant
Honor the Rules of Engagement any time you find yourself called upon to provide care to a hostile.
Basically, you need to provide to a captured enemy the same quality of care you give to your own teammates.
And that includes evacuation, if so warranted.
Even so, exercise safety first! That hostile is still exactly that—a hostile—and as such poses a danger to you and your team.
Immobilize him and ensure your security before attempting to perform MARCH PAWS.
Conclusion
Once your teammates achieve fire superiority or the other side’s weapons fall silent, it’s time to shift from Care Under Fire mode to that of Tactical Field Care.
There’s a lot you can do—and likely will absolutely need to do—at this stage to prevent your buddy from succumbing to his injuries.
And because there’s a lot you can do, it’ll be easy to forget to take certain important actions.
That’s why there’s the MARCH PAWS algorithm. It’s one of the most important tools to carry with you into the fray.
Of course, telling you about MARCH PAWS is one thing.
Watching it demonstrated is something else entirely. Click over to this page to view these TCCC guidelines in action.