


When ice breaks beneath you, entry into sub-zero water is uncontrolled and disorienting. Breathing becomes erratic. Motor control begins to fail. Panic is immediate. In icy water, outcomes are decided by discipline under surprise and the ability to execute a trained sequence while the body is under extreme stress
In this blog post:
- STEP 1: Prepare Before Crossing Ice (Risk Management, Not Intent)
- STEP 2: Control Breathing and Survive Cold Shock
- STEP 3: Secure Your Gear (Hypothermia Insurance)
- STEP 4: Ice Self-Rescue Using the Seal Crawl
- STEP 5: Hypothermia Prevention After Ice Rescue
- Ice Rescue Protocol When Operating With a Buddy
- Training Drill: Controlled Ice-Rescue Setup
- Conclusion
This article breaks down the essential actions for surviving an ice breakthrough, from pre-crossing risk management and cold shock control to ice self-rescue, hypothermia mitigation, and team-based rescue procedures. It also explains how these skills are trained safely in a controlled environment, as demonstrated in Pro’s Guide to Winter Survival, Episode 4: Ice Rescue and Cold-Water Exposure.
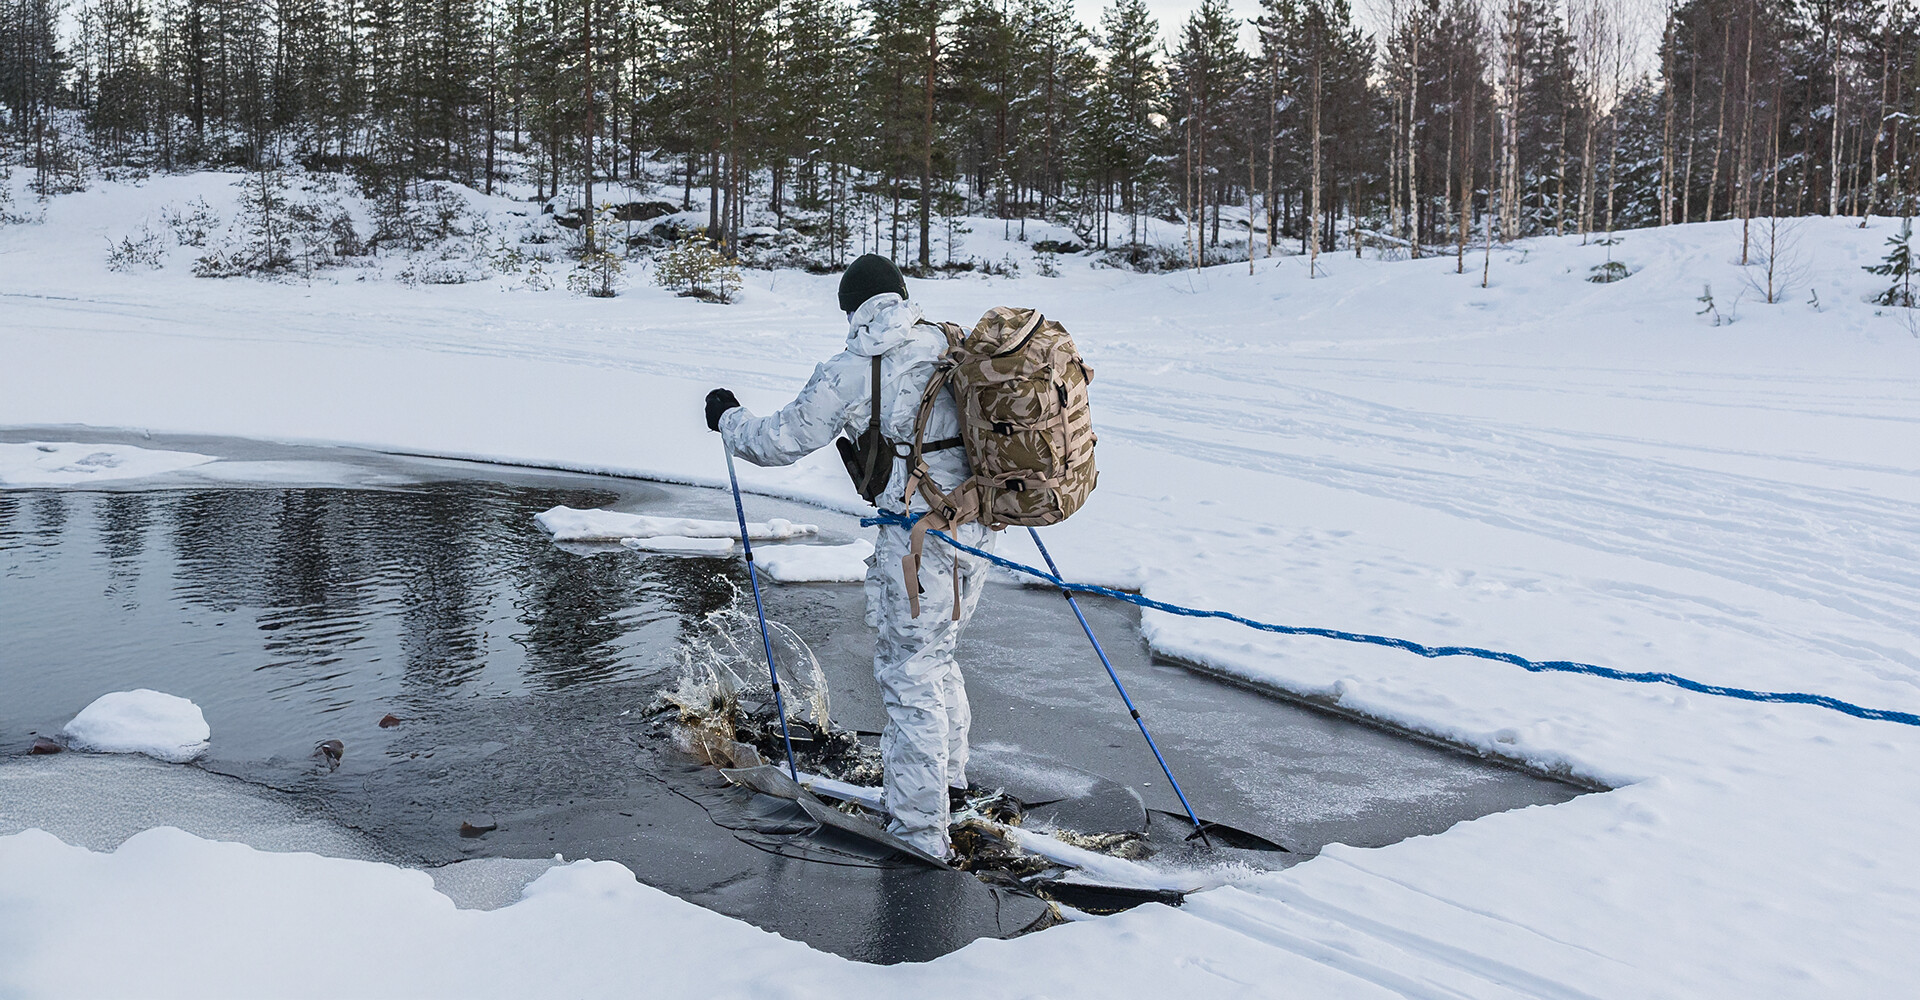
STEP 1: Prepare Before Crossing Ice (Risk Management, Not Intent)
Survival begins before you ever step onto the ice. Preparation does not mean intent. It means acknowledging that ice failure is sudden and unforgiving.
Simple adjustments made before crossing can dramatically increase survival time if the ice breaks.
Reduce anchor points
Remove wrists from loops such as ski pole straps. If the ice traps you, loops prevent free movement and tool use.
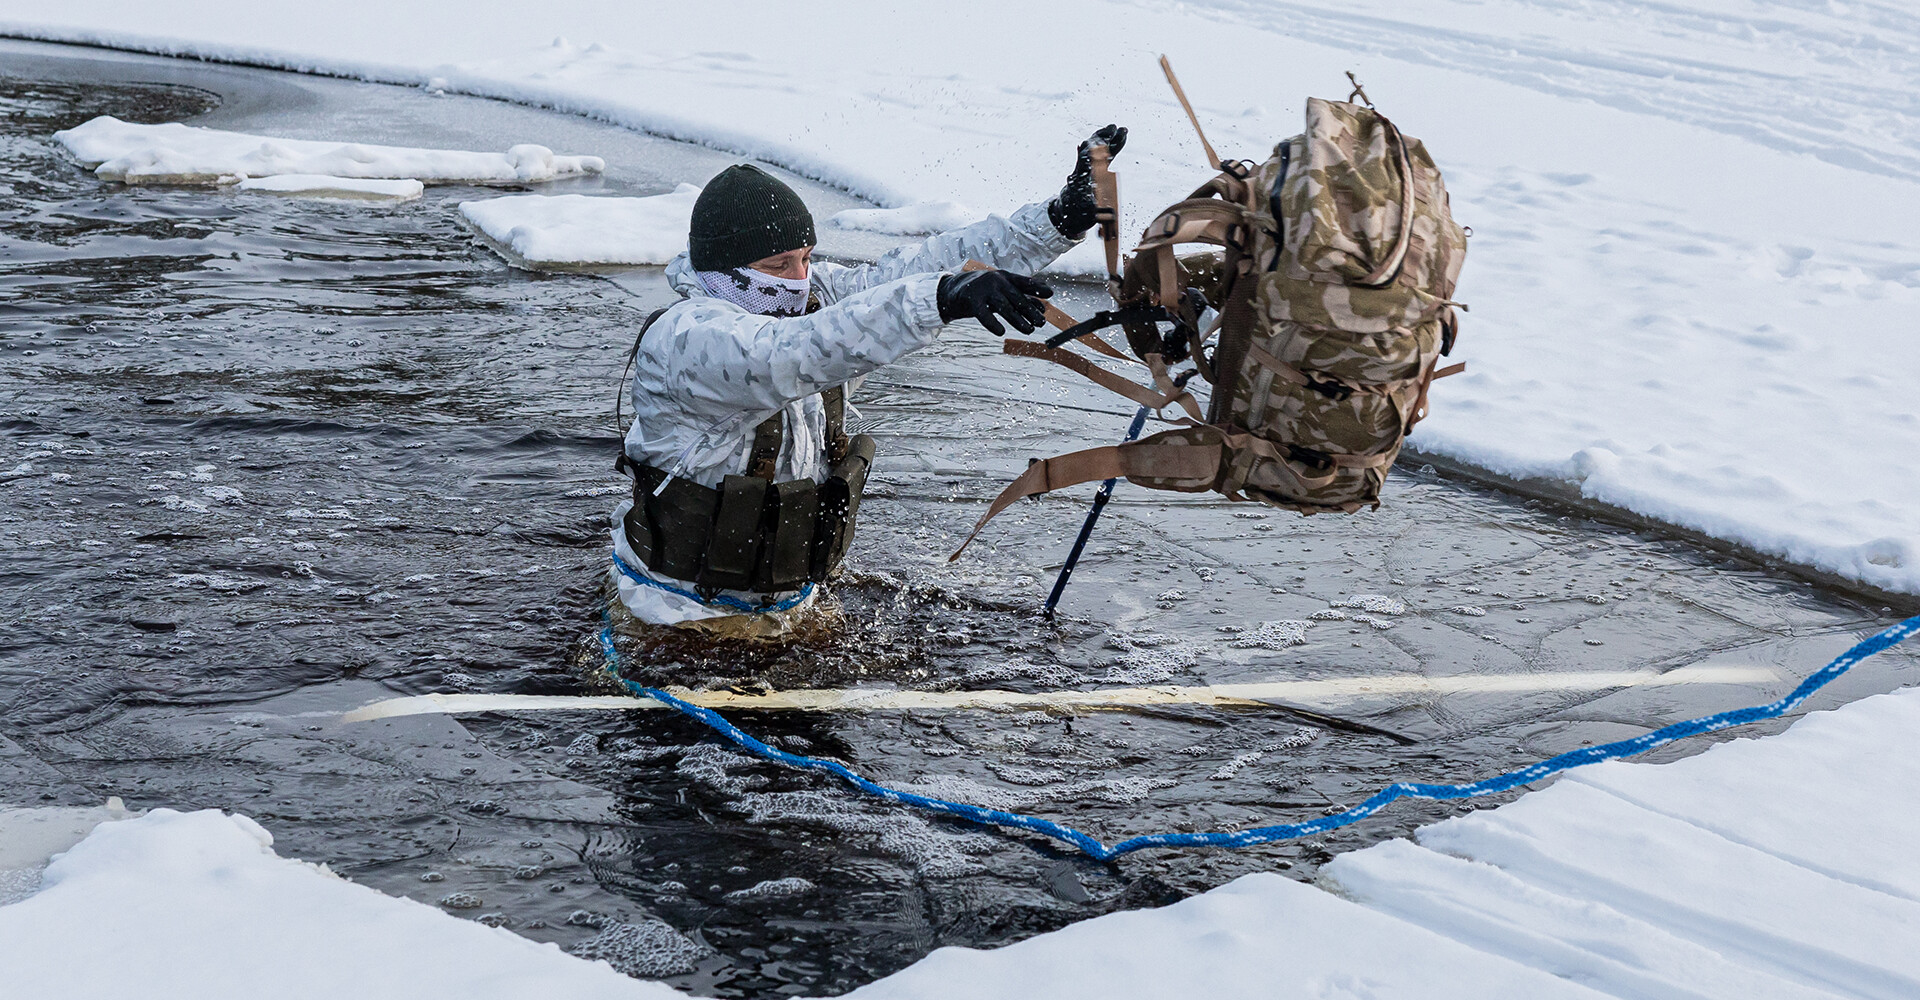
Manage the backpack counterweight
Carry your rucksack with one shoulder strap only. If you fall through the ice, immediately throw the pack onto the surface. The pack provides flotation and contains dry layers that serve as your hypothermia insurance.
Ready your tools
Ice spikes, poles, or similar tools should be in hand when moving across questionable ice.
Ice claws
If available, wear ice claws around your neck or carry them in an external pocket for zero-second access. Ice claws (also called ice picks or ice awls) are small, hand-held self-rescue tools designed specifically for getting out after falling through ice. Their sharp spikes provide far better grip on wet, brittle ice than ski poles or bare hands, making them the most effective tool for ice self-rescue.
STEP 2: Control Breathing and Survive Cold Shock
When you break through ice, the body’s immediate response is cold shock. Breathing becomes rapid and uncontrolled. The first priority is air control.
You did not choose the water. The goal of the first minute is to stop panic from turning a survivable incident into a fatal one.
The 1–10–1 rule
- 1 minute to regain control of breathing
- 10 minutes of meaningful movement before muscle function deteriorates
- 1 hour before loss of consciousness due to hypothermia (variable)
The 60-second mandate
Force breathing control immediately. Panic leads to water inhalation.
Controlled breathing cycle (4-4-4)
- Inhale for 4 seconds
- Hold for 4 seconds
- Exhale slowly for 4 seconds
Mental discipline
Focus only on the breath count. Do not engage in negative self-talk or future thinking.
If you stabilize your breathing within the first minute, you have won the most critical phase of cold-water survival.
SUBSCRIBE TO UNLOCK OUR EXCLUSIVE CONTENT
Enter your email and get timely updates and relevant intel on tactical topics directly to your inbox.
Prijavljaš se na naše e-novice, od katerih se lahko kadarkoli odjaviš. Preberi več o tem v sekciji “zasebnost“.
STEP 3: Secure Your Gear (Hypothermia Insurance)
As cold shock subsides, your priority is securing the equipment that enables survival after extraction.
Secure the backpack
If you threw your pack onto the ice, do not let go of it. Dry layers are your only reliable defense against hypothermia.
Electronics and tools
If possible, keep water-sensitive equipment out of the water, but do not waste energy fighting weight or resistance.
The weight factor
Waterlogged clothing and boots become heavy liabilities. Do not attempt to remove anything until you are safely on the ice.
Your priority is not saving gear. It is preserving access to dry insulation.
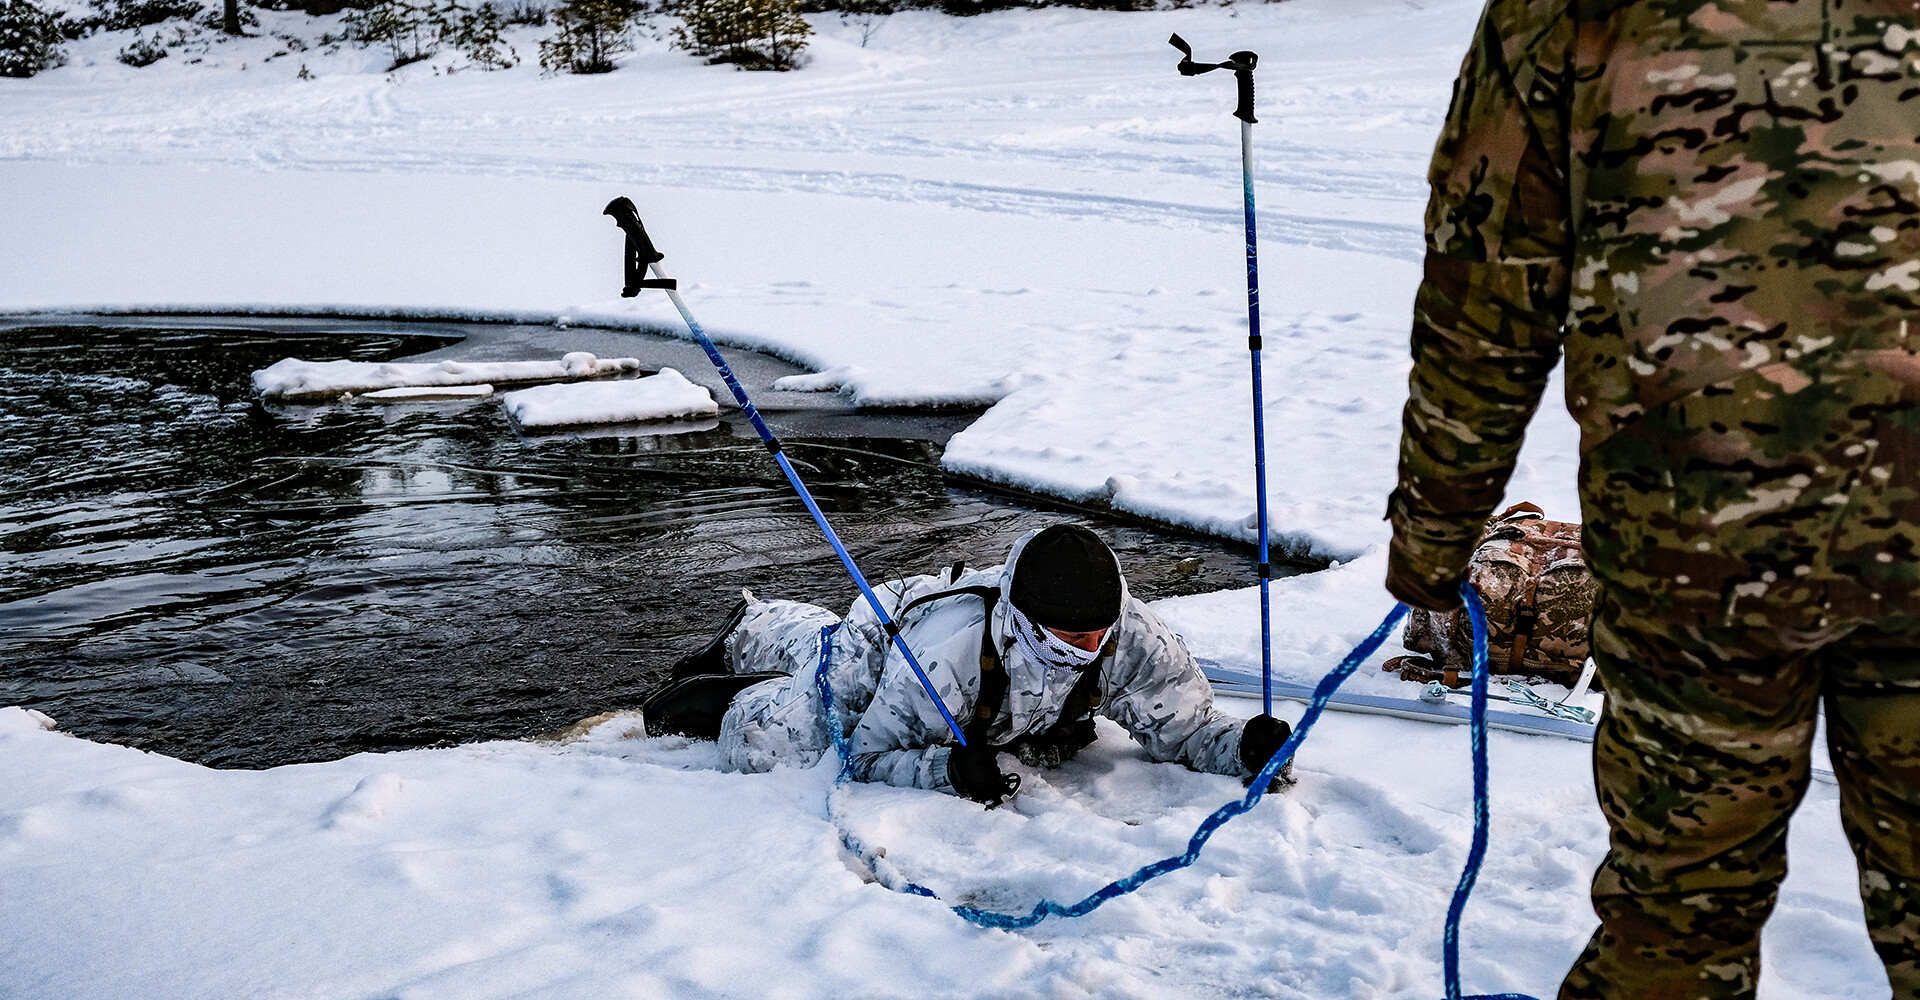
STEP 4: Ice Self-Rescue Using the Seal Crawl
Do not attempt to climb out vertically. The ice edge will continue to break.
Exit where you fell
Turn back toward the entry point. That ice supported your weight once.
Horizontal extraction
Drive ice tools, spikes, or forearms horizontally into the ice edge. Kick your legs to generate forward momentum.
The Seal Crawl
Once your torso is on the ice, stay low. Spread your weight and crawl several meters away from the hole before standing.
Move to proven safety
Only stand when you reach shoreline or confirmed thick ice.
Successful ice self-rescue relies on weight distribution and horizontal movement, not strength.
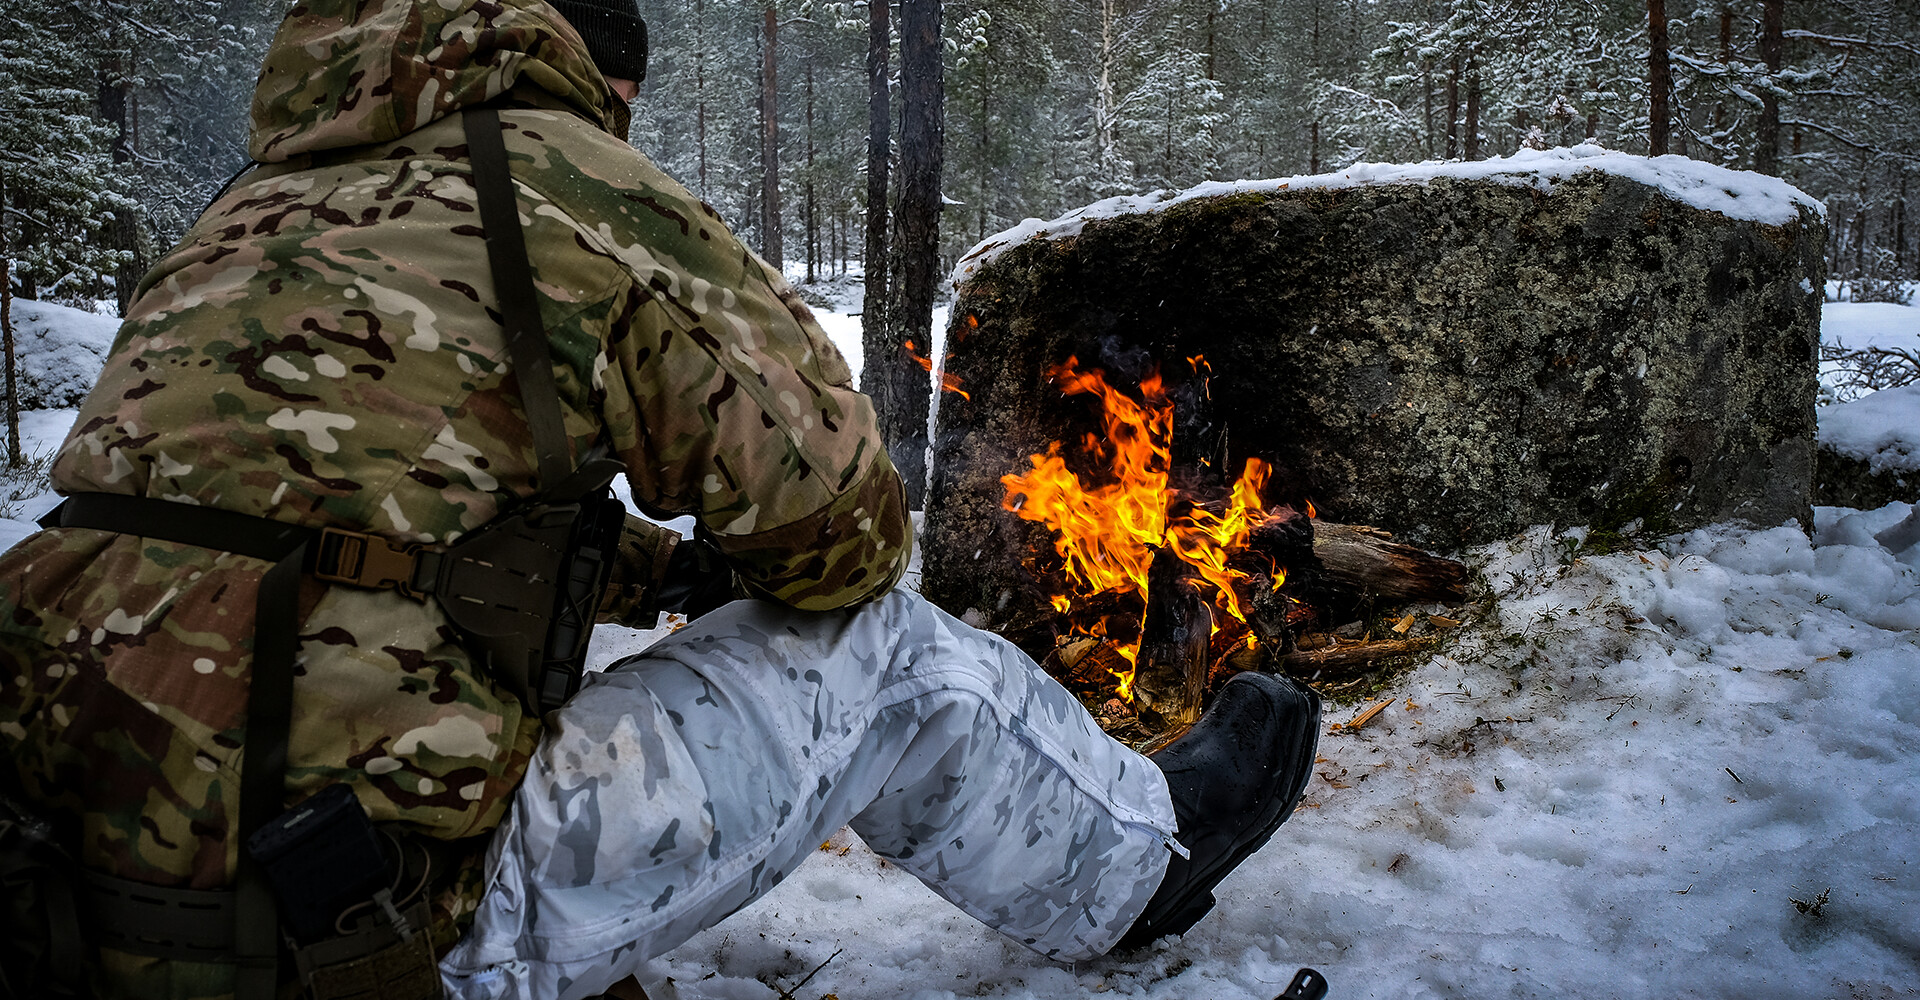
STEP 5: Hypothermia Prevention After Ice Rescue
Extraction is not the end of the emergency. Hypothermia now becomes the primary threat.
Conductive heat loss
Wet clothing strips heat rapidly. Every second increases core temperature loss.
Recognize hypothermia stages
During mild hypothermia (approximately 35–32°C), shivering is active and self-rescue is still possible. If shivering stops, your window narrows rapidly.
Immediate dry change (speed drill)
Strip wet layers and replace them with dry clothing from your pack as fast as possible.
Wind protection
Create an immediate wind block using a tarp, thermal blanket, or natural cover.
Prioritize core warmth
Insulate head, neck, and torso first.
Movement and calories
Generate heat through movement and consume high-fat, high-sugar food to fuel shivering.
Once on solid ground, changing clothes is the single highest priority task.
Ice Rescue Protocol When Operating With a Buddy
If operating as a team, rescuer safety is non-negotiable.
The “Don’t Go In” rule
The rescuer never enters the water.
Reach from stability
Use poles, ropes, belts, branches, or any rigid object. Lie flat to distribute weight.
Anchored rescue
If two people are present, the second person secures the rescuer and provides an anchor during extraction.
A successful rescue depends on maintaining absolute stability at all times.
Training Drill: Controlled Ice-Rescue Setup
The techniques described above are trained and demonstrated in a controlled environment. This is not cold exposure for toughness. It is a safety drill designed to rehearse correct responses for an unplanned ice breakthrough.
Drill setup
- Pre-cut entry point under supervision
- Safety personnel on standby
- Rescue lines, flotation aids, and extraction tools in place
- Immediate exit after completing the extraction movement
Training objectives
- Experience the initial cold shock response safely
- Practice breathing control under stress
- Rehearse the Seal Crawl extraction
- Reinforce post-extraction priorities without prolonged immersion
This drill is demonstrated in Pro’s Guide to Winter Survival in Episode 4: Ice Rescue and Cold-Water Exposure, allowing the full sequence to be shown without unnecessary risk.
Safety mandate
Ice rescue and cold-water training must never be conducted alone or without professional supervision, rescue capability, and medical oversight.
Conclusion
Ice will break without warning. Cold shock will trigger panic. Preparation is the only buffer between shock and survival.
Cold-water survival follows a strict sequence:
- Breathing control
- Horizontal extraction
- Immediate hypothermia prevention
Master these phases, train the response safely, and condition the mind to recognize panic. When the ice fails, discipline, not instinct, decides the outcome.
Želiš še več?

Pokaži več

Vsi članki so prikazani