When tracking, you rarely find multiple clear signs in the same area. But that rarely matters, because even a single track holds a massive amount of information. In this post, skilled tracker Boris Vos shares an exercise to gather information from a single shoeprint impression.
In this blog post:
Introduction
By Boris Vos
Until now you have been working on your sign recognition through the pace-to-pace exercises. These exercises are great to sensitize yourself to seeing sign in different substrates. We’ll have a bit more fun with that in future posts, as it really is one of the foundation exercises of tracking. But today I would like to do something a bit different.
Tracking is not just about trailing a quarry and following the sign that he/she has left behind. That same sign holds a wealth of information about your quarry and helps you to make intelligent assumptions about your quarry’s identification, characteristics and actions. It may aid you in predicting with reasonable accuracy what their intentions are and what their actions will be.
And it all starts with a single shoeprint.
In this post we will cover so-called track traps, the class- and identifying characteristics of a footwear impression, how to record this information and how you can identify indicators of action in a single footwear impression.
As trackers, it is very possible that you may follow sign for long distances without actually finding a nice, clear, shoeprint, or footwear impression.
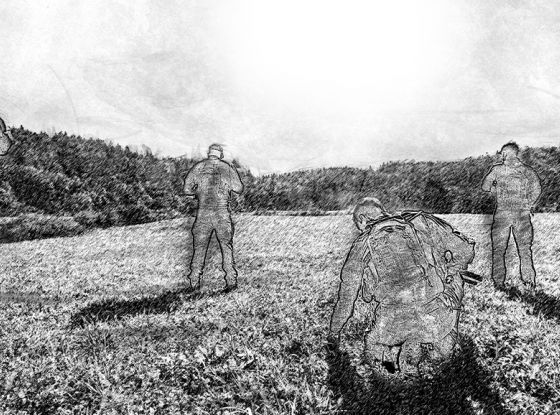
For example, in dense forest where leaves are covering the ground, or tropical rainforest for that matter, you may be tracking on color change alone for kilometers at a time. But every once so often you hit a soft spot of sand, maybe at a river’s edge or at the entrance of an animal’s burrow. To a tracker, that is the equivalent of having your Birthday and Christmas on the same day. A substrate that is conducive to leaving good sign is what we call a track trap. It does what it says on the tin: it traps a track.
Unless you are in hot pursuit and are in close proximity of your quarry, it is worth taking a moment to study the tracks in the track trap. They hold a wealth of information for you to explore. It’s time for a deep dive!
Exercise 21 | A Single Footwear Impression
Time to complete: approx. 60 mins.
The setup of this exercise is really simple. Download and print the Human Print Data Card, and make sure you have a tape measure and pencil in your pocket. Wear your favorite footwear and find a place where you can make a clear impression. A top layer of finer sand really helps. This is your own personal little track trap. Now make one single impression in the sand. Don’t just put your foot down, but rather take a step into and over the sand. This will give you a realistic, dynamic impression. Draw a circle around it and you’re good to go!
Class Characteristics
Ok, let’s have a look at the tread pattern.
The regularity in the impression will give you a good indication of the type of footwear your quarry is wearing. It may be a flat sole or have a heel. It may have a specific shape, or a very recognizable tread pattern. It may be an outdoor/military type boot, a trainer or a sandal. The choice of footwear of your quarry may tell you something about how compatible they are with the environment they’re in. Converse All-Stars in the middle of the Australian outback? Maybe not so much.
(As found during the search for a couple who abandoned their broken-down car in the 90’s in Australia’s western wilderness. They were recovered alive by Aboriginal trackers).
Sometimes the brand of the footwear is visible in the footwear impression, as may be the case with certain trainers or leisure type footwear.
All the above can give you information about the make and/or model of the footwear your quarry is wearing. In forensics, these and the thread pattern of the sole are called the class characteristics of the footwear.
You can use the Human Print Data Card now to make an accurate drawing of your footwear impression. Of course, everyone carries a phone these days and it is a good idea to take photos for reference. However, making a drawing allows you to really highlight details that may not be visible on a photo on your phone. You can also add more information to the same drawing as you find more details further down the track.
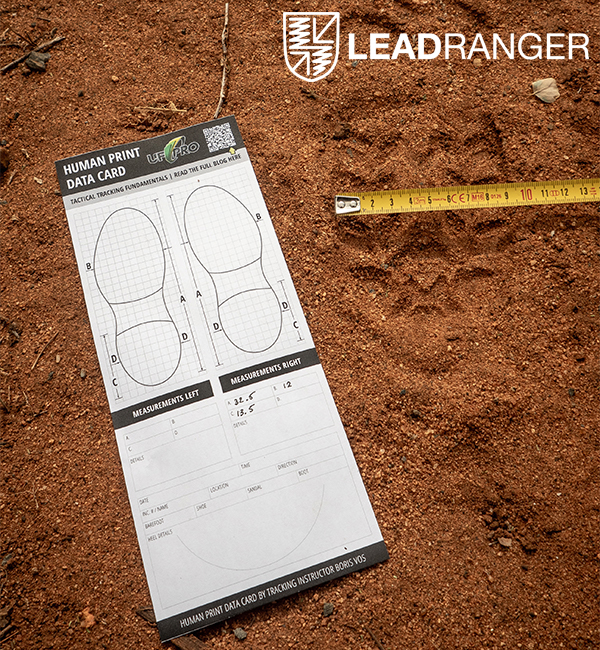
Image description: Taking accurate measurements.

Image description: HPDC has been filled in with all the details. Note the damage and wear have been noted on the HPDC.
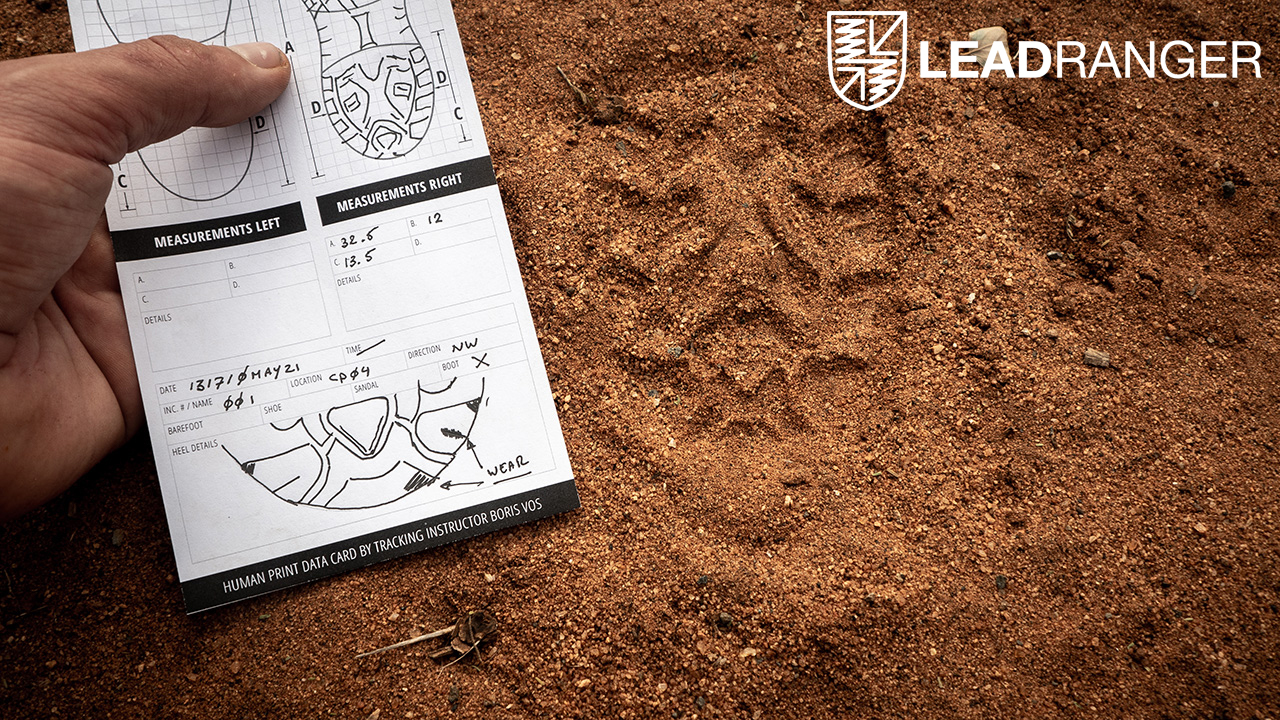
Image description: Remember, the primary impact point is often best defined. That's why we put those details down separately and in more detail. Note the wear on the heel.
It is very likely that more than one person in the area is wearing the same type of footwear. In the case of Vibram soles, about 35 million (!) are sold every year. So, the class characteristics alone will not help you to identify a specific individual. You need to look for identifying characteristics.
Identifying Characteristics
The first thing you look at are the dimensions of the footwear impression. You measure the length and width of the total impression, and the length and width of the heel. By doing this accurately, you have already narrowed down the search when looking for this specific impression among others with the same class characteristics.
You also try to identify any specific wear and damage to the footwear. This is really a great identifying feature and is unique for the individual’s footwear, and the wear and damage really allow you to identify this specific footwear. In the drawing, you can highlight these areas by shading or adding a note.
Top tip:
To get an indication of the height of a person, measure the length of the footwear impression, and multiply by 6. This will give you a rough estimate of the height of your quarry (metric system).
This is however assuming that your quarry has well fitting shoes/boots and is only an assumption until confirmed.
As you proceed with the track, you might find more details that you can add, and this is where a drawing really comes into its own. There’s no need to flick through countless photos in your phone. Also, drawing forces you to study the track in detail. This will pay dividend further down the track.
So, you have now recorded the information about your footwear impression. It’s time to look at how you can interpret certain actions from this single impression.
The Dynamics of a Footwear Impression
Walking on two feet is an incredible feat of nature. From the moment we get out of bed in the morning, and we start walking towards the kitchen, our body is continuously keeping us balanced and upright. As we walk, we shift our balance from the left to the right and are using our legs and balance to propel us forward.
So, let’s look at a normal walking pace first. As the heel of our forward foot hits the ground, it absorbs the force of impact. In tracking, this is what we call the Primary Impact Point (PIP). The PIP is often well-defined because of the straight angle of the impact. On harder surfaces, the PIP may be all you’re going to get.
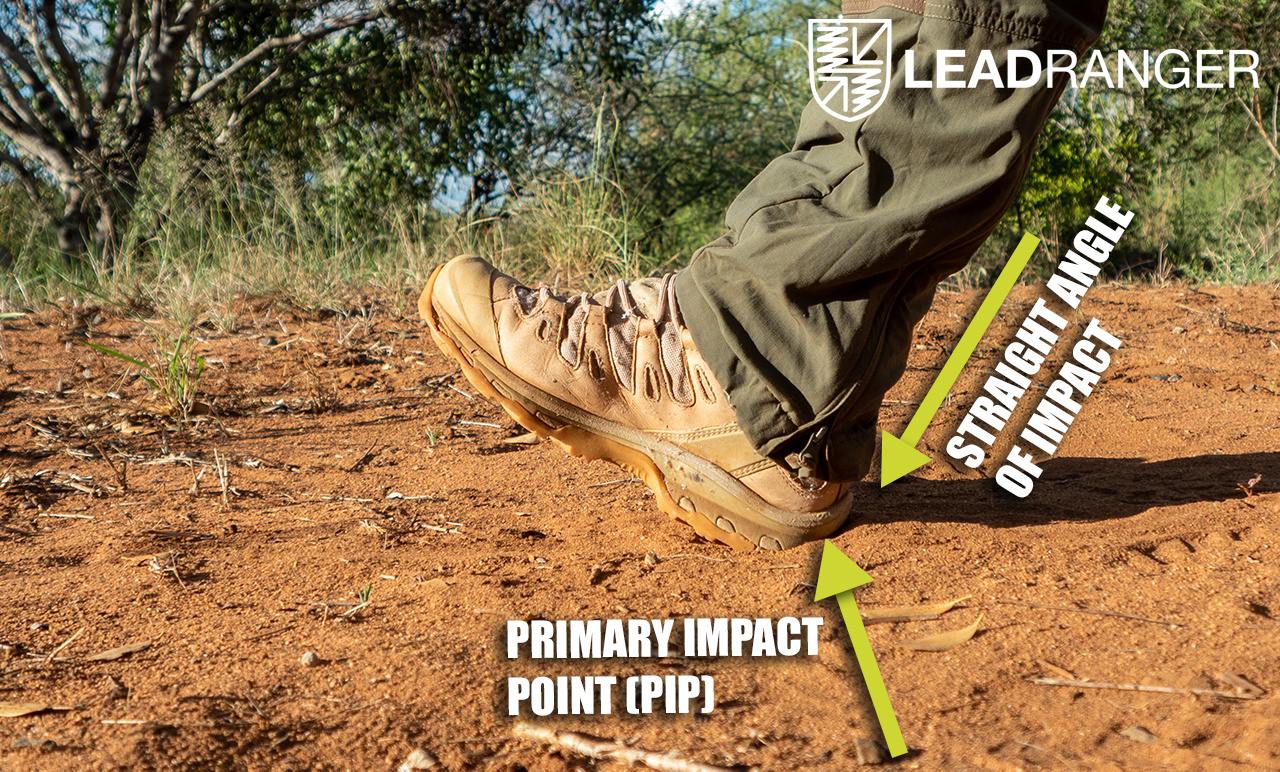
As we shift our body weight and swing our opposite leg forward, our foot rolls towards the toes with every increasing pressure, trying to propel us forward. This is called the foot roll.
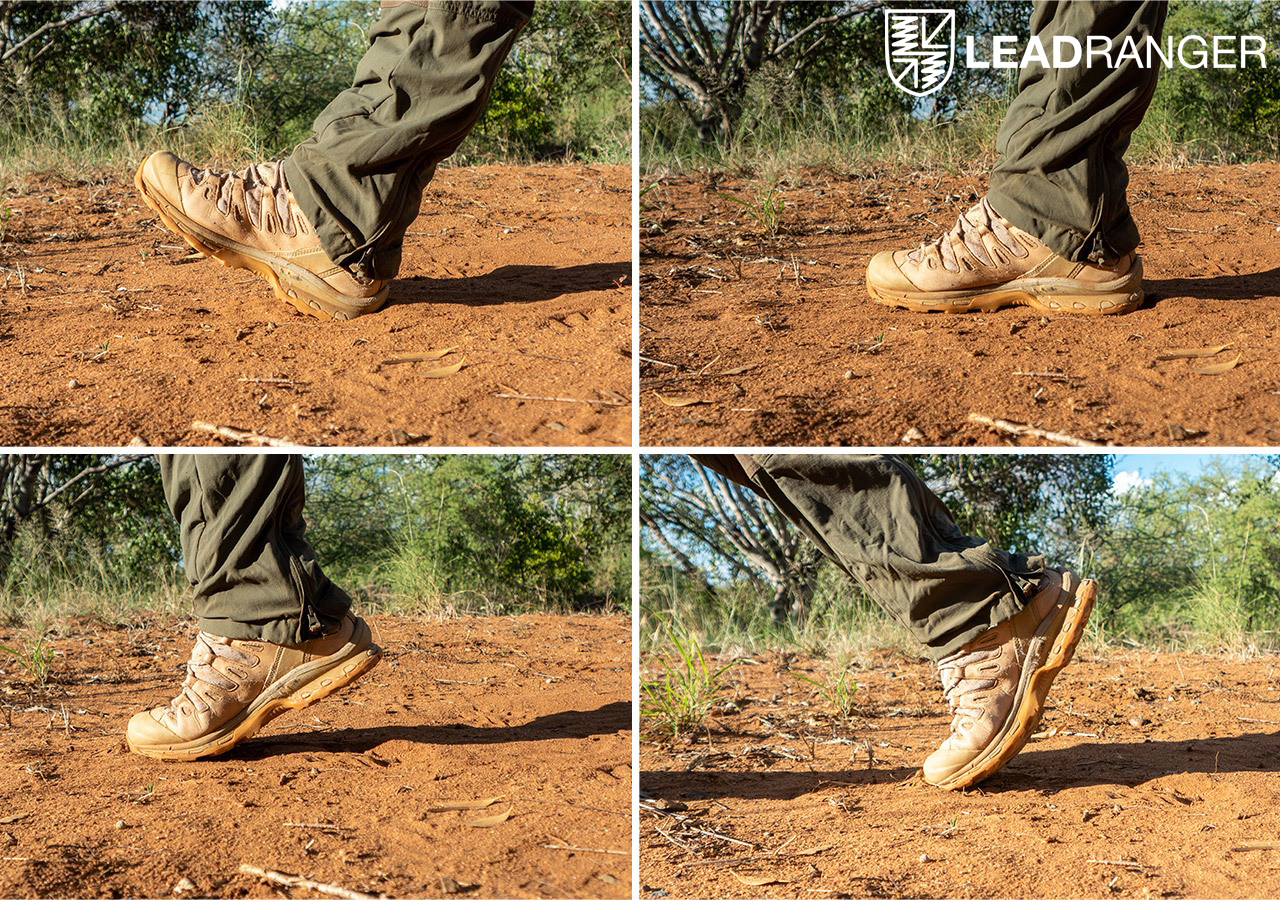
The pressure keeps increasing, and as we shift our balance to the other side, the foot leaves the ground. The last point where the foot or shoe is in contact with the ground, is called the Terminal Point (TP).
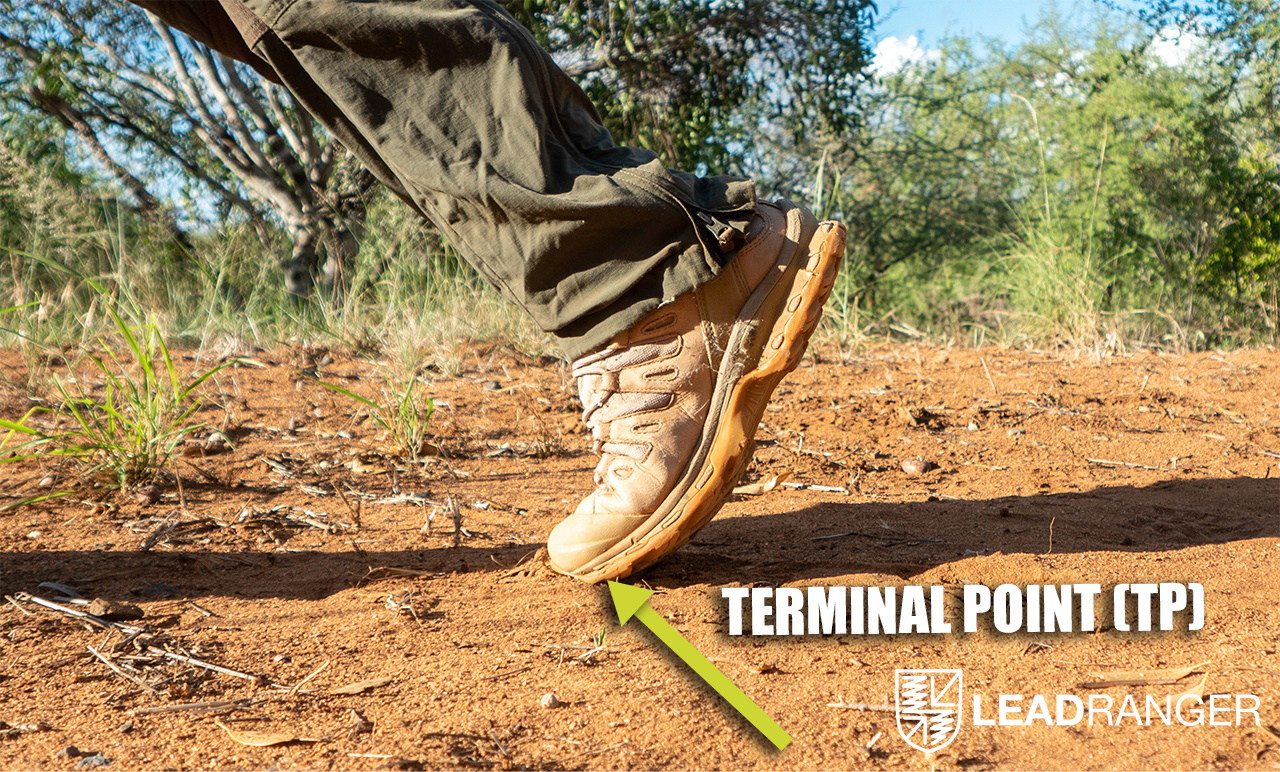
These are what we call the Dynamics of a Footwear Impression and are indicators of action. As the action changes, the PIP, foot roll, and TP change as well.
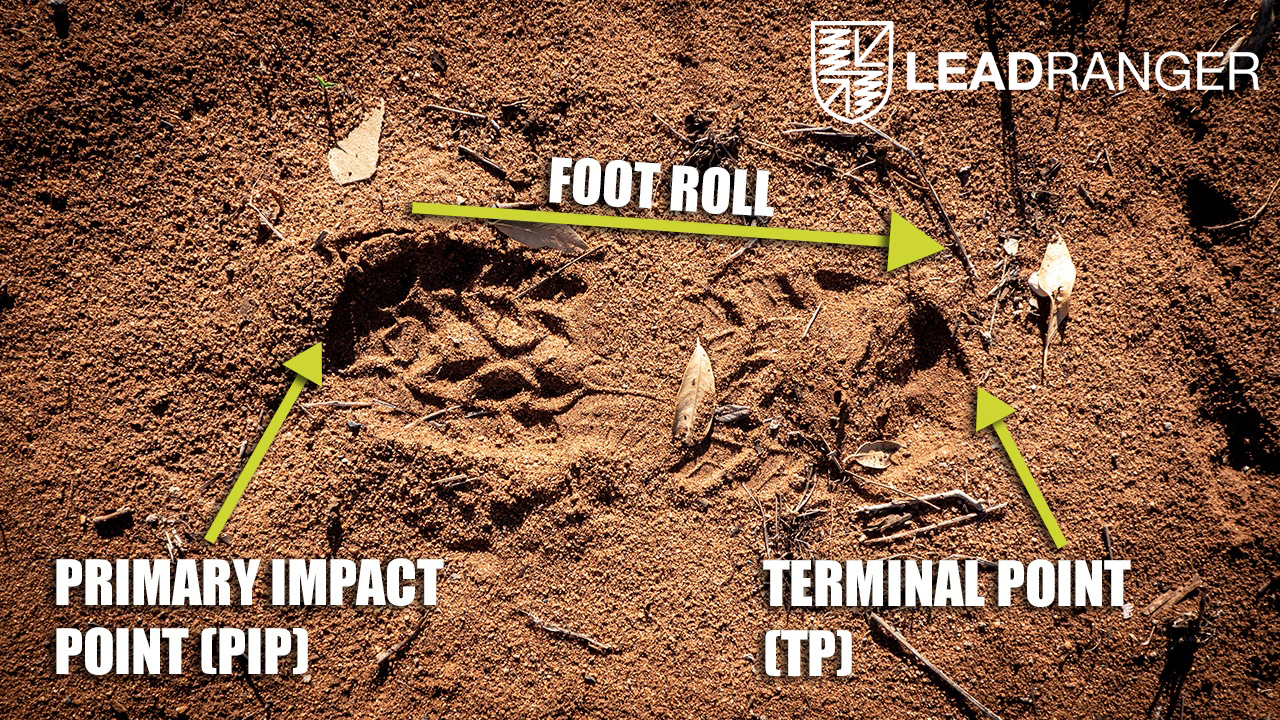
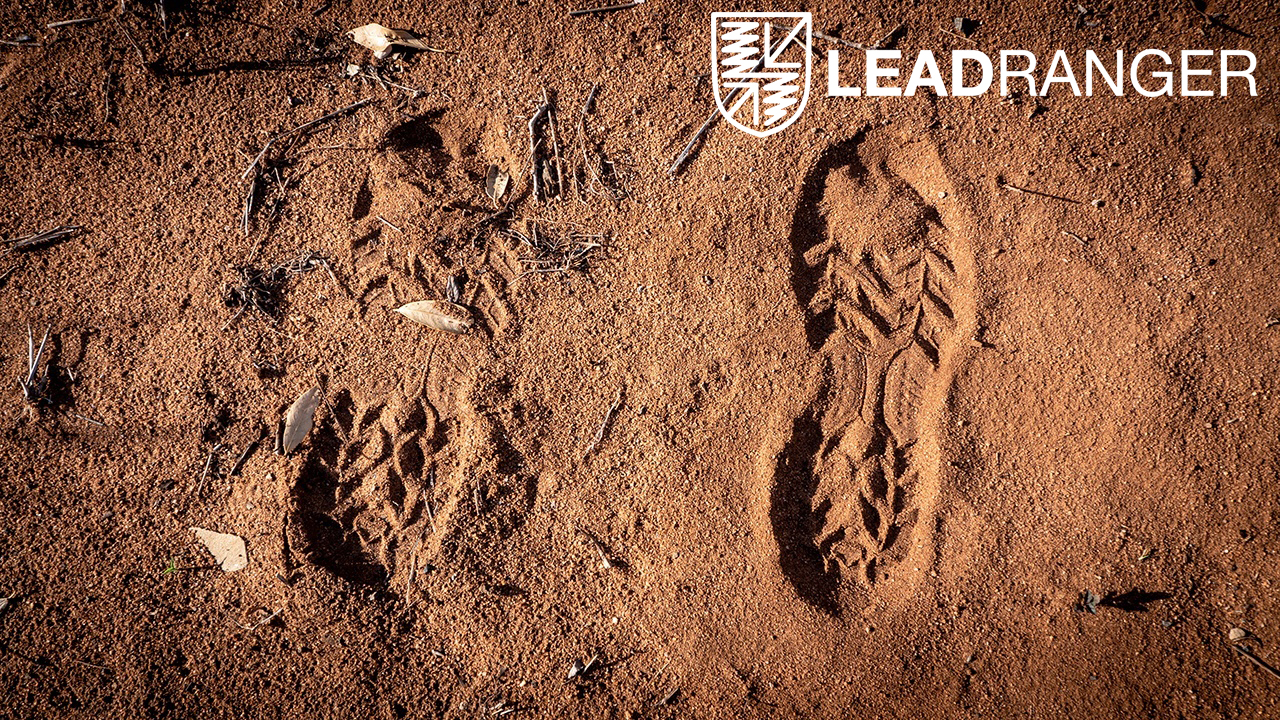
As you can see in the footwear impression, the heel is very much defined and clearly visible.
Remember? It is the Primary Impact Point and absorbs much of the impact.
As the foot is rolling, the pressure to propel forward is increasing and the regularity in the thread
pattern is getting more and more disturbed.
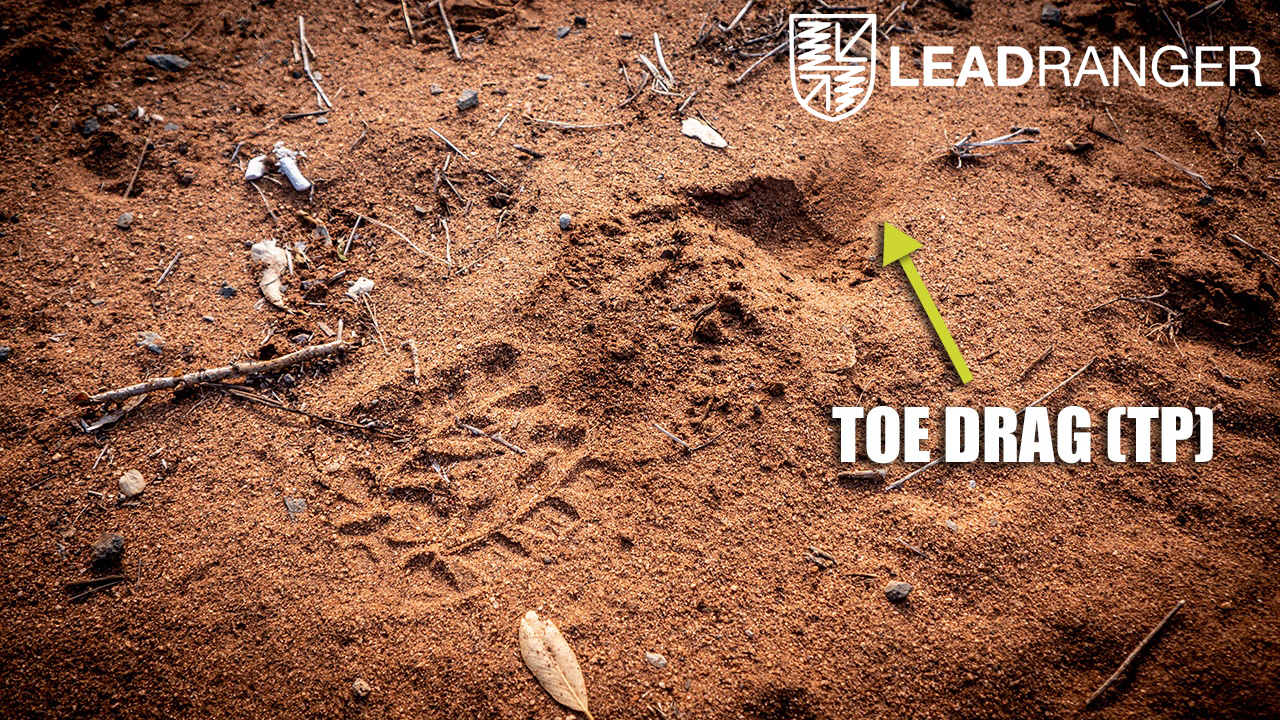
The terminal point is clearly visible as well, and you may even see a bit of toe drag, where the soilis dragged forward with the moving foot. Got it? Sweet! Now let’s look at what happens when the action changes.
Direction
Let’s have a look at the below picture. On the left, we have a footwear impression of a person walking at a normal speed. You can see the PIP, the foot roll, and the TP. Now look at the impression on the right. What is the difference?
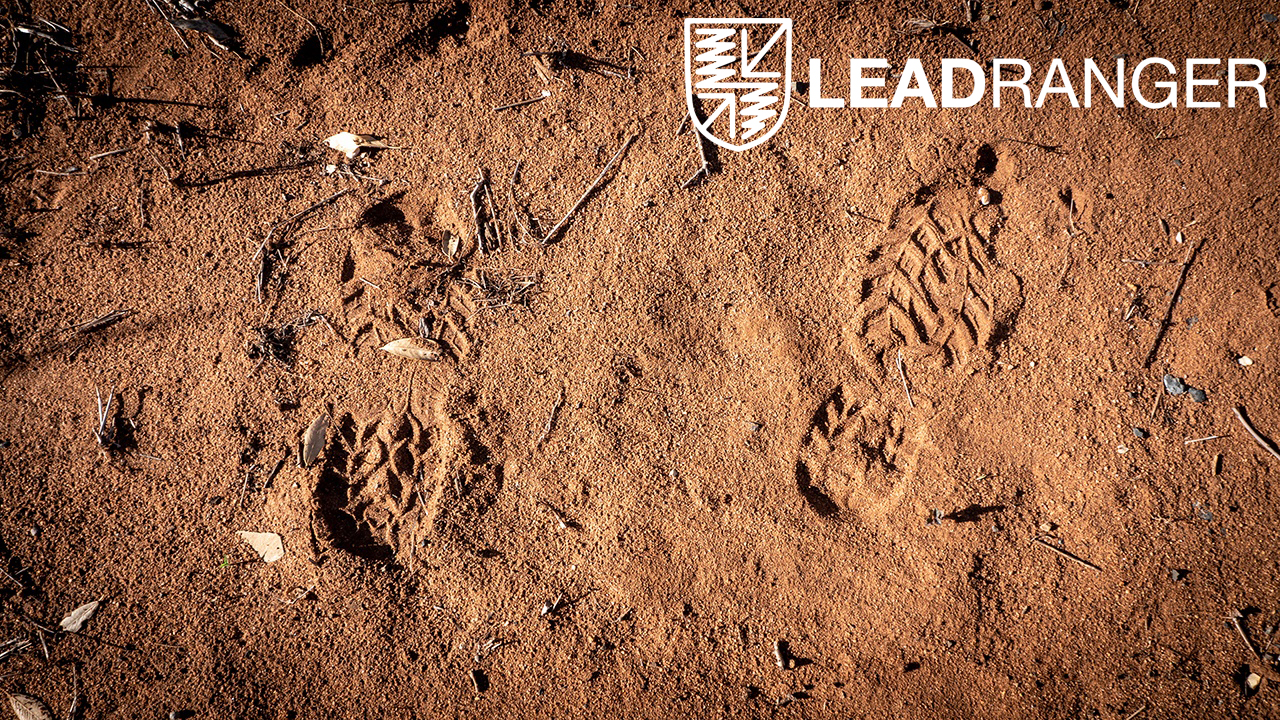
As you can see, the heel of the impression on the right is not very well defined, but the front (ball) is. Remember, the PIP is the most defined part of the impression. It seems on the right the PIP is at the toe of the impression, and the TP is at the heel. You guessed it: the person is actually walking backwards.
Why is that important? Depends on your role. More on that in a future post.
So, we know now that as the activity changes, the dynamics of a Footwear Impression change.
Walking backwards, the PIP is at the toe, and the TP is at the heel. Unless your Michael Jackson ;)
Speed
Let’s look at the picture below:
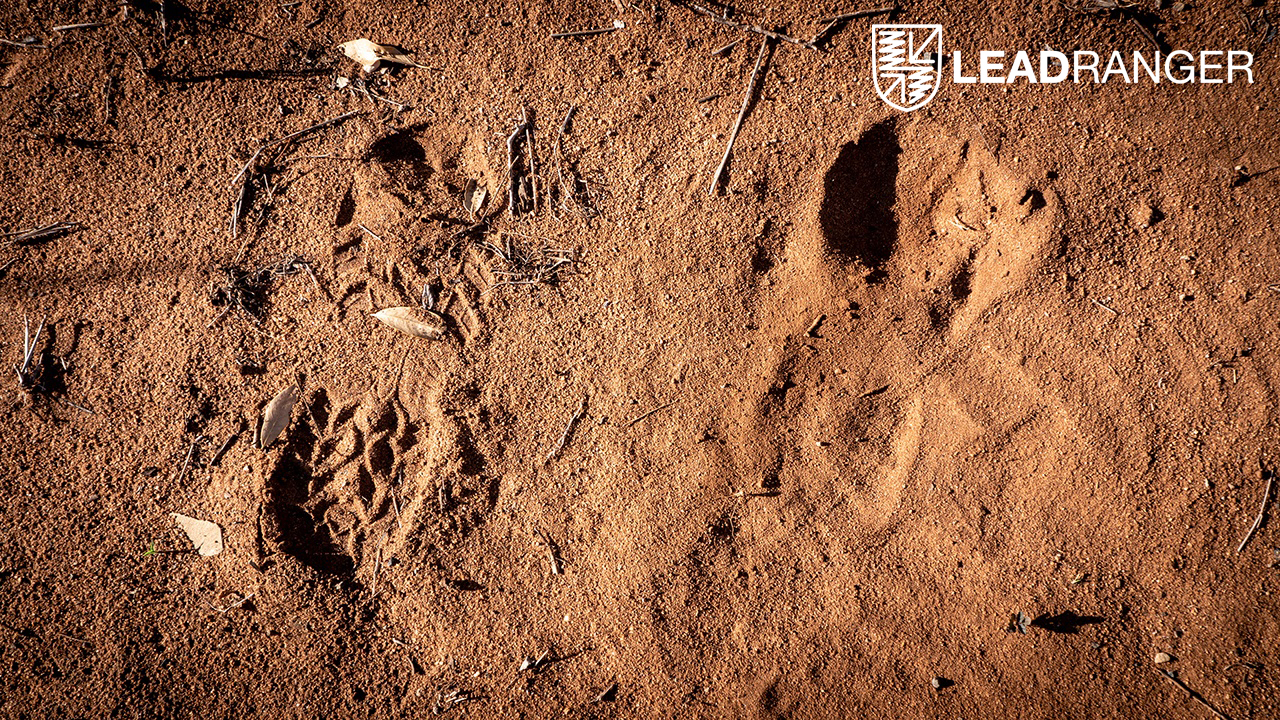
What do you see? On the left is the normal walking print. On the right, you can see a different
picture. There seems to be no clear PIP at the heel and a lot more pressure and disturbance
towards the front of the foot. You may have guessed it already; this is the impression of someone sprinting. The PIP is actually at the rear of the ball of the foot, and the great amount of pressure required to propel forward creates all the disturbance. The heel only ever so lightly touches the ground!
As speed changes, the PIP may change, and you will see an increase in disturbance due to the increased pressure.
Weight
Finally, let’s discuss weight. As the total weight of the quarry increases (body weight plus any
equipment), the amount of pressure exerted on the ground increased.
Have a look at the picture below. As you can see, the right impression is deeper throughout. The persons are the same, but on the right he is carrying about 60kg of weight.
Determining total weight is not as straightforward as it may seem though. Reason may tell you that as weight increases, the impression keeps getting deeper.
However, this is not true. Unless you’re in quicksand or a swamp, you can only compress that substrate so much. At some point, adding weight will not make the impression deeper.
The appearance of the impression is also very dependent on the type of substrate; in very loose sand an impression may be a lot deeper than on harder ground and may fool you into thinking that it is a person with a heavy total weight.
The only way to find out is to make your own impression right next to the quarry’s. Compare the depth, and it will tell you if the quarry’s total weight is heavier or lighter than yours. There are other indicators of weight, carried equipment and such. But I think we went down the rabbit hole far enough for today ;)
Wrap-up
To the keen observer a single footwear impression, perhaps found in a track trap, holds a wealth of information. Recording that information on a drawing helps you study the track, highlight any identifying characteristics and add to the same drawing further down the track as you are gaining more details.
The dynamics of a footwear impression help you to assess your quarry’s direction of movement, speed and weight from a single impression.
In the next post we will talk about tracking in the forest, on leaf litter, the importance and difference between ground- and top sign and natural lines of drift. And there will be a story about tracking on spiderwebs ;)
Alright, brewski time!
As always, take some pictures, tag us on Instagram (@rangerboris and @ufprogear) and let us know how you’re getting along with these tracking exercises. Also, let me know how the length of your impression relates to your total height. See you next time. Go get it!